Saturday, June 18, 2016

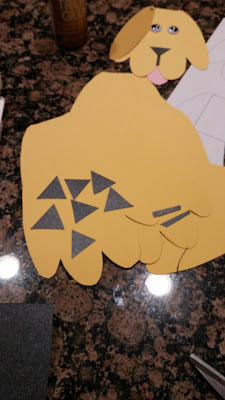
Dog Party Invitations


 Materials:


  • Construction Paper (I used 3 pieces of the golden paper 12x12 to make 8 invitations to fit in a 5x7 envelope, 1 page of pink for the tongue, 1 page of black for the nose)
  • Googly Eyes
  • Glue
  • Round fasteners
  • Pin


Step 1: Create a template for the dog face / ears (I did this with my computer in google presentations). Start with a heart and turn it upside down. Then use the circular shape and make long ovals for the ears, and a square for the head.


Step 2: Print the template to the size you want for your invites.

Step 3:  Cut out the template and trace the dog face onto the construction paper, then cut it out. I made 8.


Step 4:  Turn the dog face right side down and glue the tongue onto the back so when you flip it over, it looks like the dog is sticking his tongue out.

Step 5:  Turn the dog face right side up and glue the nose onto the face.

Step 6:  Glue the googly eyes onto face next


Step 7: Line the cut out ears up with the dog face and take a pin and push through the ear and the face.  Wiggle the pin around a bit and then take the pin out.  I used tiny fasteners so I had to put the fastener though the ear hole first and then the dog face so I wouldn't bend the paper. Open the fastener on the back so it stays in place.


Step 8: Swing the ears open and write down the party details under each ear.


Step 9: Put the dog invites in an envelope and mail! We decorated the envelope with dog paw stickers.

Here is another tutorial that is very helpful!

Sunday, June 12, 2016

Crafts


Quilts, Hair Bows, Make-Up Bags


Dresses, Pillowcases, Candles out of wine bottles, rocking chair, Xmas Stocking, Gel Seashell Candle


Baby Blanket


Materials:


  • Cozy Flannel or Cotton Fabric for the front and back (I used 2 different fabrics- cut 1 yard by the width of the fabric)
  • Pins
  • Thread
  • Sewing Machine
  • Scissors


Step 1: I had tow different fabrics and the widths were different so I cut the fabric to the same size width


Step 2: Place the pretty sides of the fabric together and pin around the edges.  The wrong side of the fabric will be showing


Step 3: Sew 1/2 inch around the edges of the fabric, but leave a hole at least 6 inches so you can turn the fabric right side out.


Step 4: Turn the fabric right side out and make sure that all of the corners are pushed out so it makes a 90 degree angle and is not wonky.  You can take a pen and push out the corners.


Step 5: Sew the 6 inch hole closed by rolling he excess fabric into the hole and pin closed. Sew a straight stitch.


Step 6: Top stitch around the fabric if you want.


Sunday, May 15, 2016

How to Make an Oversized Beach Bag


Materials:

  • Main Fabric 24.5 x 44 inches
  • Lining Fabric 24.5 x 44 inches
  • Interfacing 23.5 x 43 inches
  • Straps 5 x 40 inches
  • Interfacing strips 1 x 40 inches
  • Pocket Fabric 21 x 14 inches
  • Zipper at least 14 inches
  • Thread
  • Sewing Machine
  • Glue Stick
  • Scissors

Step 1:  Cut and iron all fabric pieces

Step 2: Iron the interfacing onto the wrong side of the main fabric


Step 3: Create the pocket.  On the pretty side of the main fabric, measure at least 2 inches down and draw a straight line across horizontally.  Mark the center of this line. I marked mine with chalk.

Step 4: On the wrong side of the pocket fabric, measure 1.5 inches down from the top.  Draw a horizontal line.  From this line, measure above 1/4 inch and below the main line 1/4 inch.  Create a horizontal line at these 1/4 inch measurements. From the left side of the pocket fabric, measure in at least an inch and do the same thing on the right side.  This should create a box with a horizontal line in the middle.  From the corner of the box measure a line about 45 degrees creating a triangle at the end of the box.


Step 5: Place the right side of the pocket fabric on the right side of the main fabric matching up the lines created in the steps above. Pin and sew around the box that you created in step 4.


Step 6: Cut on the center line and cut straight down and also cut the lines you made for the 45 degree angle.


Step 7: Put the pocket through the hole you just cut and iron.  The pocket fabric should now be on the wrong side of the main fabric and there is a horizontal hole when you look at the main fabric. Iron both sides of the fabric.


Step 8: Put glue around the right side of the zipper and place the main fabric pieces (where the hole is) over the zipper. 


Step 9: Sew around the zipper 1/4 of an inch so the zipper attaches to the main fabric bag. 

Step 10:  With the main fabric facing right side down, iron the pocket and fold the pocket up and pin around the pocket itself. Be sure not to catch any of the bag fabric in the pins. Sew around the pocket.


Step 11: Pin the right sides of the main fabric together when you fold the bag in half. Sew the two sides 1/4 inch. (Your main part of the bag is complete).


Step 12: Sew the lining fabric right sides together leaving a hole 4-6 inches (so you can eventually turn the bag right side out).

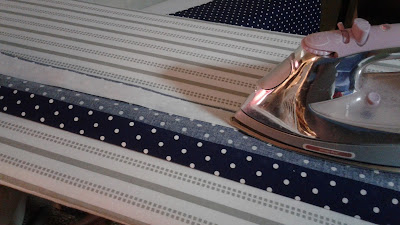
Step 13:  Iron the straps in half (hot dog style) and iron.  Open the fabric back up and you will see the crease. Bring each edge to the crease and iron.  


Step 14: Take interfacing for the straps and iron the interfacing to the wrong side of the strap fabric. Fold the following the creases and top stitch the straps on each side 1/4 inch.


Step 15: Have the main fabric wrong side facing out and put your hand in the bag and push out the corner of the bottom bag as you will be making a triangle and cutting gussets.  Make a triangle about 2 inches, pin, and sew a straight line, cutting off the excess. Do the same thing with the other side of the bag and the lining fabric.


Step 16:  Assembling the bag.  The main bag should be wrong side out.  Attach the straps and choose your placement. I pinned them 2.5-3 inches in from the side seams. Leave the straps inside the bag.  Then take the lining fabric, right side out, and put lining fabric bag inside the main bag.  Sew around the edge of the bag so that the main fabric sews to the lining fabric and the straps are also attached all in the same stitch.


Step 17:  Find the hole that you left in the lining fabric and pull the main fabric bag right side out.  Push out the corners and sew the lining hole closed.  Put the lining fabric bag into the bag and you are done.


Saturday, May 14, 2016

How to Make a Lanyard


Materials:


  • Fabric 43 x 3 inches
  • Hook to attach your item to
  • Scissors
  • Thread
  • Sewing Machine
  • Iron


Step 1:  Cut your fabric out. (If you dont have long enough fabric cut 2 pieces of fabric to sew together to make longer)


Step 2:  Iron!

Step 3:  Fold the fabric in half (hot dog style) and press with your iron.


Step 4: Open the fabric back up and fold each outer edge towards the middle crease and iron


Step 5:  Fold again hot dog style and iron


Step 6: Top stitch the lanyard


Step 7:  Slide the fabric into the hook of your choice and sew the the two ends together creating a big loop and DONE!


Thursday, May 12, 2016

How to Make a Case for Sunglasses or Eyeglasses


Materials:


  • 1 Main fabric piece measuring 8X9 inches
  • 1 Lining fabric piece measuring 8X9 inches
  • 1 Piece of interfacing 7x8 inches
  • 1 Piece of fabric (same as main fabric or lining fabric-you choose) 2x5 inches
  • Scissors
  • Thread
  • Sewing Machine


Step 1:  Cut the main fabric and lining fabric to 8x9 inches.

Step 2:  Cut the interfacing fabric one inch shorter 7x8 inches.

Step 3:  Iron the fabric pieces flat and smooth

Step 4:  Lay the interfacing piece of fabric down on the wrong side of the main fabric and iron. I could iron on the interfacing with it facing me because only one side of my interfacing is fusible.


Step 5:  Lay the main fabric and the lining fabric, right sides together, and sew around the edge 1/4 inch and leave a hole about 2 inches or more so you can turn the fabric right side out.

Step 6:  Cut the excess fabric corners and turn right side out.


Step 7:  Iron the fabric flat


Step 8:  Take the 2x5 piece of fabric, fold in half and iron the crease. Open the fabric up and bring one edge to the middle/where you see the crease and iron that flat.  Do the same thing with the other side. Fold again to make a tab and sew a straight stitch down the tab.


Step 9:  Fold the main piece of fabric, right sides together with the tab about an inch from the top. You will sandwich the tab between the main pieces of fabric. (The lining fabric will show on the outside at this point.)


Step 10:  Sew around the fabric, except for the opening where the sunglasses will enter.

Step 11:  Turn right side out, iron, and DONE!