Materials:
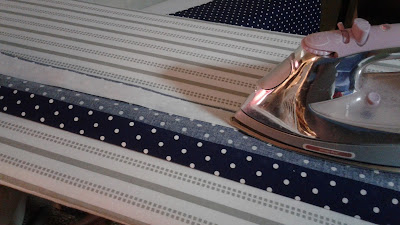
- Main Fabric 24.5 x 44 inches
- Lining Fabric 24.5 x 44 inches
- Interfacing 23.5 x 43 inches
- Straps 5 x 40 inches
- Interfacing strips 1 x 40 inches
- Pocket Fabric 21 x 14 inches
- Zipper at least 14 inches
- Thread
- Sewing Machine
- Glue Stick
- Scissors
Step 1: Cut and iron all fabric pieces
Step 2: Iron the interfacing onto the wrong side of the main fabric
Step 3: Create the pocket. On the pretty side of the main fabric, measure at least 2 inches down and draw a straight line across horizontally. Mark the center of this line. I marked mine with chalk.
Step 4: On the wrong side of the pocket fabric, measure 1.5 inches down from the top. Draw a horizontal line. From this line, measure above 1/4 inch and below the main line 1/4 inch. Create a horizontal line at these 1/4 inch measurements. From the left side of the pocket fabric, measure in at least an inch and do the same this on the right side. This should create a box with a horizontal line in the middle. From the corner of the box measure a line about 45 degrees creating a triangle at the end of the box.
Step 5: Place the right side of the pocket fabric on the right side of the main fabric matching up the lines created in the steps above. Pin and sew around the box that you created in step 4.
Step 6: Cut on the center line and cut straight down and also cut the lines you made for the 45 degree angle.
Step 7: Put the pocket through the hole you just cut and iron. The pocket fabric should now be on the wrong side of the main fabric and there is a horizontal hole when you look at the main fabric. Iron both sides of the fabric.
Step 8: Put glue around the right side of the zipper and place the main fabric pieces (where the hole is) over the zipper.
Step 9: Sew around the zipper 1/4 of an inch so the zipper attaches to the main fabric bag.
Step 10: With the main fabric facing right side down, iron the pocket and fold the pocket up and pin around the pocket itself. Be sure not to catch any of the bag fabric in the pins. Sew around the pocket.
Step 11: Pin the right sides of the main fabric together when you fold the bag in half. Sew the two sides 1/4 inch. (Your main part of the bag is complete).
Step 12: Sew the lining fabric right sides together leaving a hole 4-6 inches (so you can eventually turn the bag right side out).
Step 13: Iron the straps in half (hot dog style) and iron. Open the fabric back up and you will see the crease. Bring each edge to the crease and iron.
Step 14: Take interfacing for the straps and iron the interfacing to the wrong side of the strap fabric. Fold the following the creases and top stitch the straps on each side 1/4 inch.
Step 15: Have the main fabric wrong side facing out and put your hand in the bag and push out the corner of the bottom bag as you will be making a triangle and cutting gussets. Make a triangle about 2 inches, pin, and sew a straight line, cutting off the excess. Do the same thing with the other side of the bag and the lining fabric.
Step 16: Assembling the bag. The main bag should be wrong side out. Attach the straps and choose your placement. I pinned them 2.5-3 inches in from the side seams. Leave the straps inside the bag. Then take the lining fabric, right side out, and put lining fabric bag inside the main bag. Sew around the edge of the bag so that the main fabric sews to the lining fabric and the straps are also attached all in the same stitch.
Step 17: Find the hole that you left in the lining fabric and pull the main fabric bag right side out. Push out the corners and sew the lining hole closed. Put the lining fabric bag into the bag and you are done.


No comments:
Post a Comment